If you are interested in taking sewing projects, you should aim at finding a quality sewing machine that will suit your needs. Ensure that you understand the available types of sewing machines available and know the one that will suit your project, depending on the features they possess. Also, it is advisable to understand how they work because this will help you in case a problem arises. For instance, a Singer sewing machine is a common sewing tool preferred by most people due to its performance. Continue reading this guide to learn more about threading and setting up singer sewing machines.
How to Thread a Singer Sewing Machine
Threading a singer sewing machine might be a complex process when you do not follow the required steps. However, with the available information all over the internet, it can be easy to thread your singer sewing machine. The following are some of the steps that you need to consider when threading a singer sewing machine.
• Turn Off the Sewing Machine
The first step in this process is to turn off your sewing machine. Find the power switch on the side of your sewing tool and switch it to the off position. It is the essential thing that you should consider before you start threading your machine. Since you will be inserting threads through the moving parts, it is a critical step that you should never forget if you want to avoid accidents.
• Raise the Needle
The next step here is to raise the needle using the handwheel on the side of your singer sewing machine. Remember that you can freely adjust all moving parts since the power is switched off. You can now turn the wheel on your right side in the clockwise direction to move the sewing needle upwards. Once it reaches its highest point, stop turning the wheel.
• Lift the Presser Foot
After you have raised the needle, the next step is to lift the presser foot using the lever. You can push it upwards to raise the foot. When you lift the presser foot, it will be easy to thread the machine.
• Thread the Top of the Sewing Machine
Before you start threading the top of your sewing machine, make sure that you wind the bobbin. After turning the bobbin, make sure that you push it back but on the right side. After doing this, apply gentle pressure to the pedal to start winding the bobbin.
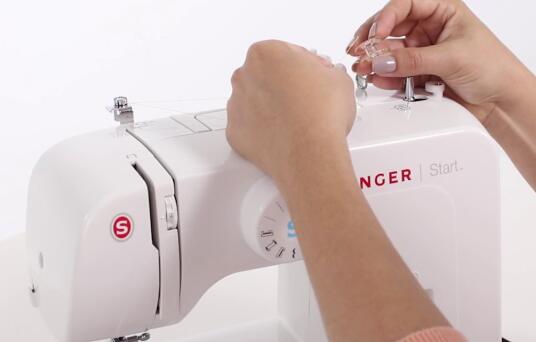
• Wrap the thread on the Thread Guide
When wrapping a thread on the thread guide, you should start with the first thread guide. You can look at the user guide to find out the function of each key while wrapping it. You need to grasp the end of the thread and place it at the top of the sewing machine. Ensure that you cover the period at the thread guide and ensure that it is around to the right side of the guide.
• Wrap the Thread on the Second Guide
After you have completed wrapping your thread on the first guide, you need to thread under and over the second guide. Note that the second guide will be next to the first guide. If you are doing this for the first time, use your manual guide to locate it.
• Pass the Thread through the Tension Mechanism and Canal
The next step here is to pass the thread through the tension mechanism and the threading canal. It is a straightforward process since you will pull the end of the thread and ensure that you wrap it around the tension mechanism. However, it is critical to understand that the threading canal is a grooved section located on the side of your singer sewing machine. You can bring the thread through the canal and around the canal’s bottom so that it can easily pass through the tension mechanism.
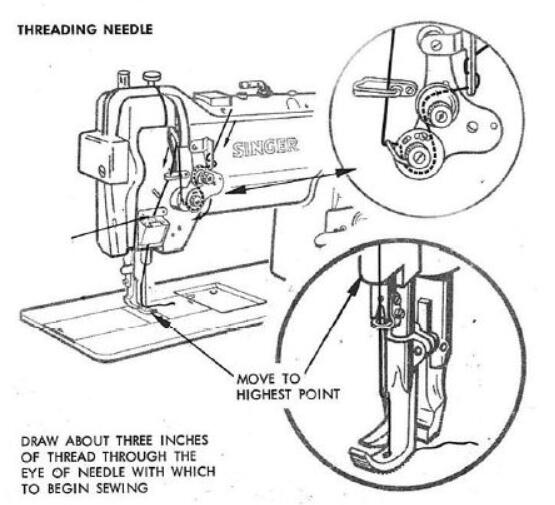
• Thread the Needle
When it comes to threading the needle, make sure that you start threading going from the front back to your sewing machine. Ensure you pull the thread down towards the eye of the needle. However, if you notice that the end of the thread is frayed, you can decide to cut it from the end.
• Load the Bobbin
When you are loading the bobbin, the first step is to rotate the handwheel in a clockwise direction to raise the needle. Make sure that it takes about a half a turn. After this, you need to open the bobbin case located beneath the sewing tool’s needle. Ensure that the bobbin case is empty once you open it.
• Place the Bobbin Using the Arrows
Before you open the bobbin, you need to identify the arrows around the outside of the case. Make sure that you use these arrows to determine the direction the thread will be going. However, make sure that you place the bobbin into the case to move the thread in the right direction.
• Close the Bobbin Case Lid
Once you put the thread through the slot, you can place the lid on the bobbin case to secure it. After closing the bobbin case lid, ensure that you turn the hand crank clockwise to catch the thread. Follow the above steps to thread your singer sewing machine.
How Do I Identify My Singer Sewing Machine?
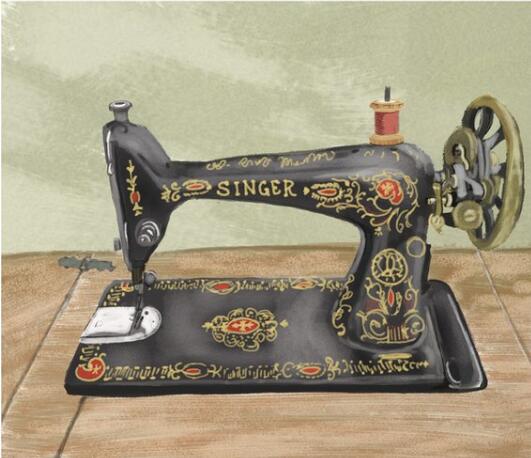
If you are among the lucky people who own a singer sewing machine, you may want to know a lot of details about the type of singer sewing machine that you have. It is crucial to understand that the first singer sewing machines were manufactured in 1851. If you want to identify your sewing machine, you can check its serial number. The serial number will be on a metal plate on your sewing machine. Once you find a serial number, make sure that you plug into a database on a singer’s website. In doing this, you will identify your singer sewing machine since you will know when it was issued.
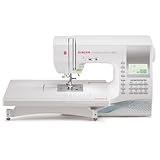
Recommended Sewing Machine For Beginners to Use

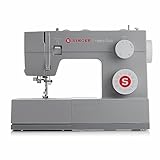
- SINGER HEAVY DUTY SEWING MACHINE: The SINGER Heavy Duty 4452 sewing machine boasts an array of features that make creating elegant garments and gifts for yourself and others fun and exciting. The Sewing machine with 32 built-in stitches includes 6 Basic, 7 Stretch, 18 Decorative Stitches and 1 Fully Automatic 1-step Buttonholes. A large variety of stitches for all types of sewing and perfect for crafts, home decor, clothing construction and much more.6.25" sewing space (needle to tower) and 4.25" height
- AUTOMATIC NEEDLE THREADER SEWING MACHINE: After following the threading path printed right on the machine, this built-in feature helps you to effortlessly thread the eye of the needle without eye strain or frustration, Machine Size - 15.5 x 6.25 x 12 inches
- HIGH-SPEED SEWING MACHINE: The Singer 4452 sewing machine has a maximum sewing speed of 1,100 stitches-per-minute, so projects can be sewn quickly. The 60% Stronger Motor than standard sewing machines allows it to sew through heavyweight fabrics with ease.
- SEWING MACHINE ACCESSORIES: Four bonus Heavy Duty optimized accessories included: Even Feed / Walking Foot for layers of fabric, Non-Stick Foot for leather and vinyl, a 5-pack of Size 16 needles and a Clearance Plate for thick seams. Plus a variety of must-have accessories are included with all-purpose foot, zipper foot, buttonhole foot, button sewing foot, seam ripper / lint brush, quilting guide, needles, bobbins, screwdriver, auxiliary spool pin, spool pin felt are all conveniently located and stored in the accessory tray. A soft-sided dust cover is also included in the packaging
- BEST SELLING SEWING MACHINE: The SINGER Heavy Duty 4452 sewing machine is a true workhorse. The stainless steel bedplate enables smooth fabric flow and the heavy duty interior metal frame ensures skip-free sewing. Top drop-in bobbin is easy to insert, remove and monitor thread supply
- This sewing machine is warranted for use in the US and Canada at 110 volts only
- Amps (0.7) / Watts (84) / Volts (120V) / Hertz (60)
How Much is a Vintage Singer Sewing Machine Worth?
As mentioned above, when you have managed to purchase a singer sewing machine, you might want to know various details concerning it that will help you later. If you’re going to see the worth of your vintage Singer sewing machine, many factors will determine its value. It is critical to understand that the singer sewing machine can vary dramatically from $50 up to $600 and over. The following are some of the factors that will determine the cost of your singer sewing machine.
• The Manufacturer
We have different manufacturers all over producing various types of Singer sewing machines. Make sure that you find a professional manufacturer who can offer you a modern singer sewing machine that will suit you. Auctions, Estate Sales, and Flea Markets are among the best sources for finding a Vintage Singer machine at a reasonable cost.
How to Use a Singer Sewing Machine
Most of the sewing machines available at the market look frighteningly complex to various individuals who have never used them. But in a situation where you have just bought your singer sewing machine, it is essential to learn how to use it. Keep reading to discover how to use a sewing machine.
• Learn the Parts of a Singer Sewing Machine
The first step of learning how to use a sewing machine starts with understanding all the parts available. It is a simple process or action that will help you to know how it works or operates.
• Find the Power Switch
Even if it may seem obvious, make sure that you start by finding the power switch. In the singer sewing machine, you will find it on the right side. It will help you to put your device on or off.
• Identify the Spool Pin
The second part that you need to locate is the spool pin. It is a metal and a plastic pin that sticks out of the sewing machine. It is used to hold the spool of your thread.
• Locate the Thread Guide
The thread guide is used to direct the thread from the spool to the bobbin winder. Ideally, it is a geometric piece that sticks out of the sewing machine.
• Tension Dial
It is a numbered wheel that controls the tension of the thread as you continue to sew. In a situation where the pressure is too light, the needle will be pulled to the right. But if it becomes loose, the thread will loop on the bottom of the fabric.
• Presser Foot
It is a metal attachment that is under the needle clamp. When in use, it holds the fabric and guides it through the machine as you continue to sew.
By understanding the functions of each part of a singer sewing machine, it will be easy to use your singer sewing machine.
Recommended Sewing Machine For Beginners to Use
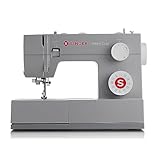
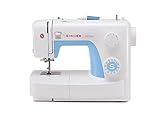
- SINGER HEAVY DUTY SEWING MACHINE: The 23 built-in stitches including basic, stretch, decorative, and buttonhole stitches allow you to sew a variety of projects, such as fashions, home décor, quilts, crafts, and more
- AUTOMATIC NEEDLE THREADER SEWING MACHINE: After following the threading path printed right on the machine, this built-in feature helps you to effortlessly thread the eye of the needle without eye strain or frustration. Amps (0.7). Watts (84). Volts (120). Hz (60)
- HIGH-SPEED SEWING MACHINE:The Singer 4423 Sewing Machine has a maximum sewing speed of 1, 100 stitches-per-minute, so projects can be sewn quickly. The 60% Stronger Motor provides greater piercing power for thick seams
- HEAVY DUTY METAL FRAME: The Singer 4423 heavy duty sewing machine is a true workhorse. With a heavy-duty metal interior frame, stainless steel bedframe, extra-high sewing speed and powerful motor, this sewing machine can sew through a variety of heavy weight fabrics and provides long lasting stability
- SEWING MACHINE ACCESSORIES: A variety of accessories are included with All-purpose foot, zipper foot, buttonhole foot, button sewing foot, seam ripper/lint brush, quilting guide, needles, bobbins, screwdriver, auxiliary spool pin, spool pin felt are all conveniently located and stored in the accessory tray. A soft-sided dust cover is also included in the packaging
- WARRANTY: SINGER 4423 Heavy Duty Portable Sewing Machine has 25 Year Limited Warranty. Note : Refer to the Videos and also the PDF attached below in Technical Specification for Manuals.
How Much Is My Singer Sewing Machine Worth?
Even if you have an old sewing machine or buying a new one from a shop, you may be curious about its value. However, it is essential to understand that the antique singer sewing machine is determined by factors such as the desirability of the model and the condition of the device. These factors will help you to determine the value of your sewing machine.
Special Note:
If you want to know more about Singer Sewing Machine or have trouble picking the best models from Singer, check the following reviews:
How to Oil a Singer Sewing Machine
Your singer sewing machine will end up working better if you clean it and oil it regularly. When you are oiling, it is advisable that you only use a sewing machine oil. The following are some of the steps that you need to consider.
• Choose the Right Oil
Choosing the perfect singer sewing machine oil is the first step that you need to know. It is crucial to note that every machine is different, and you should be careful before making your purchase. Read various manuals to know the right oil that will suit your sewing machine.
• Determine When to Oil
It is essential to ensure that you determine when to oil. However, some manufacturers recommend that you oil every month or after you have used it 15 times.
• Clean Before Oiling
If you want to oil your singer sewing machine properly, make sure that you clean it before oiling. Make sure that you turn off the device and remove all the pieces. You can use the brush to clean the lint and the dust remover to clean the needle plate.
• Start Oiling
When you are oiling your singer sewing machine, make sure that you avoid using too much oil. Make sure that you start by removing the needle plate. After you have done this, make sure that you remove the bobbin and clean it. Ensure that you read the manual to know the exact parts that you will oil.
How to Set Up a Singer Sewing Machine
For you to start using your singer sewing machine, make sure that you learn how to set up your device. On the same note, you should ensure that you know all the available parts for you to set up your sewing tool. The following are some of the steps that you should consider when setting up your singer sewing machine.
• Familiarize with the Machine
The first step in this process is to take a look at the machine. You need to ensure that you know each part and its function. For instance, you need to identify a power switch. It is the on and off button of the sewing machine available on the right side of a singer sewing machine. By understanding all the parts, it will be easy to assemble them.
• Thread Through the Front of the Machine
The next step is to thread through the front part of the sewing machine. When threading, ensure that you weave the thread through the hook in the top to change the direction of the thread. After doing this, make sure that you thread via the tension sections. In this step, you should make the adjustment based on the type of fabric you use. Lastly, when threading, ensure that you hook the thread through the available three hooks and the needle.
• Place Bobbin in Casing
Setting up a bobbin is another step that you need to consider when setting up a singer sewing machine. However, this is a complicated part that most people do not understand easily. To ensure that you do not get lost in the process, make sure that your bobbin is threading out counterclockwise. Also, start by placing the bobbin in its casing and thread through various areas on the top to thread into the available special gap. Lastly, test the bobbin before closing the bobbin case.
• Put the Bobbin in the Machine
When the bobbin is in the casing, the last step is to place it in the casing. When putting it in the machine, you need to hear a snap when the bobbin is properly inserted. If you want to pull the bobbin thread through your sewing machine, make sure that you hold the thread that is in the device. Turn the handwheel until the needle completes one full stitch. Lastly, pull the top ribbon, and in doing this, it will guide the thread up and out. Now you can use your singer without any interruptions.
What Year Was Singer Machine Made?
When you plan to purchase a singer sewing machine, make sure that you take your time to find out the year that it was made. However, since 1851, the name Singer has been famous. By going through the history of sewing machines, you will know the exact year that your sewing machine was made.
How to Fix Timing on Singer Sewing Machine
It is vital to understand that your sewing machine’s timing is critical, especially when it comes to attaining even stitches in your fabric. If you want to fix timing on a singer sewing machine, the following are some of the steps that you should consider.
• Identifying the Problem
The first step here is to identify the problem. You can check a timing problem by performing a timing test. You can test the alignment of the needle and the hook.
• Adjust the Timing
When you are adjusting the timing, make sure that you set the needle bar eight. It is critical to note that most of these machines have marks that will help you know the height of the needle bar. You can use your manual to check on some of the areas that you are not sure of.
How to Adjust Tension on Singer Sewing Machine
If you have a problem with your tension, it is critical to ensure that you learn how to adjust it. The following are some of the steps you need to consider when planning on fixing the tension on a singer sewing machine.
• Find the Regulator and the Tension Discs
The first step that you need to consider in this process is locating the tension discs and the regulator. If you notice that the tension is too loose, ensure that you increase the numbers so that it is tight.
• Adjust the Bobbin Tension
It is essential to ensure that you adjust your top tension, especially if you are using a lighter thread. After fixing it, make sure that you locate it at the bottom with a bobbin case or at the top of the bobbin.
How to Take Apart a Singer Sewing Machine
If you want to disassemble your sewing machine, there are some of the steps that you need to consider. It is critical to note that many sewing machine repairs can be made at home. By reading the user guide, you can follow all the steps available to disassemble all the parts of your singer sewing machine.
Conclusion
If you want to learn more about the singer sewing machine, this is the right post that you need to read. By following the above steps, it will be easy to thread it and operate it. Also, whenever a problem arises, it will be easy to fix it. In other words, threading a singer sewing machine is easy when you follow the required steps.